Showing posts with label glass. Show all posts

Wednesday, 31 July 2013

tching!


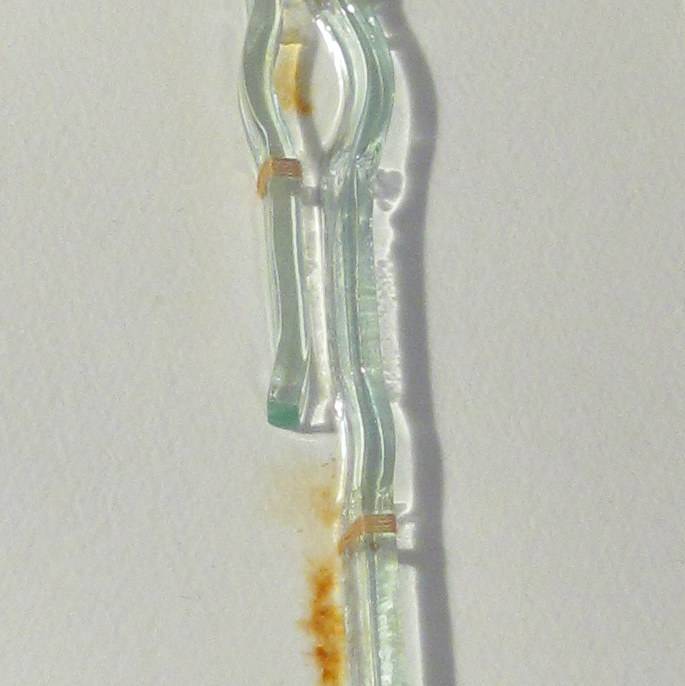
I took this rather lovely thing out of the kiln on Monday.  It was quite cool to the touch and survived being cleaned up with no problem.  But the kiln shelf underneath must have been warmer than I thought and the sudden change in temperature shocked the glass; because as it has been sitting on the desk beside me, every so often I hear little 'tching' noises as it has gradually started to crack... you can see the biggest crack in the bottom left hand corner but there are others all up that side. Aah, the joys of working with glass!

So this piece is destined to be used in a 'what if' type experiment.

Whereas the piece below is from a different firing and is behaving itself; at least I managed to get one piece finished and framed up.  Better go and cut up some more glass!


Tuesday, 23 April 2013

Drawing the horizon

I'm still plugging away, firing more and more glass strips.  I laid out all the ones I'd done so far this morning.


It's getting there, but not quite what I want yet.  I lined them all up a bit better and added the prints for the next sets of strips to the end and it began to look a bit more like it...


Laying the strips nice and straight rather than a bit haphazard made quite a difference; it's something I'm going to have to take into consideration when I'm fixing them all together.

(Apologies for the poor photographs, it's not easy to find the space to lay them all out, impossible to find somewhere with good lighting as well!)

Tuesday, 26 March 2013

Progress and Setbacks

Since I posted about finding a technique I wanted to explore, I had a bit of a setback.  I did a series of experiments and made various samples and, all of a sudden, it stopped working.  Cue a mild attack of panic and a series of unsuccessful experiments, followed by a quiet afternoon trying to remember what on earth, what tiny, seemingly insignificant thing, I had done differently before. Fortunately it dawned on me, I had an anxious day waiting for the test kiln firing to finish, but it worked... phew!

So I've been putting together some little glass-and-wire fences.  Or maybe trees.


The next issue to sort out was the wire; the first one I used broke when it was twisted tightly. The next one was a bit flimsy;  although I do want to channel broken down fences, not so much that I can't get the thing to stand up at all...


On to the next wire; this one is quite a bit thicker and I did think it might be too thick, but I'm pleased with the way it has turned out.  The pieces have a nice sturdy feel to them and I do like the black colour of the wire.  Although I might attack it with a little salt and vinegar and see what happens...


And so, on to the next challenge, to sort out the image printed on the glass.  Currently it's a bit too 'all over' for my liking.

Thursday, 28 February 2013

Finding my way


Isn't it funny how trying just one thing can suddenly make everything fall into place? And about time too you might say, as I am very nearly at the end of my degree course.

In the first year of the course I fell in love with collagraph printing. Creating the plates; the way the ink echoed the texture of the plate and the unpredictability of the print itself; the variations in the strength of the marks; everything.

Ever since then I have, sometimes consciously and sometimes not, been trying to replicate that effect in glass.

First I tried copying the images I had created from the collagraphs and screenprinting them onto the glass.  That worked, up to a point, but for me the screenprinting process meant that the images lost the essential sense of texture that they had as prints on paper.  They were just too definite, too clean.

Untitled

Then I tried creating plaster moulds in the same way that I create collagraph plates and casting the glass in these moulds.
So far the results of this have been somewhat unpredictable. I dare say if I pursue it, eventually I will get it to work as I want, but it is a time consuming process, and also one which uses a lot of expensive glass frit.  I have also realised that to do this I will have to get used to using more robust materials to create my textures; both to stand up to the mould making process and to create definite enough marks on the glass; and I'm not sure that I want to change my materials so much.

But then the other day I had one of those 'I haven't tried that' moments and these little printed strips were the result.

They may not look much but I am very excited about them.  The print on the back of the glass was taken from one of my collagraph prints; the glass was laid on top of it in the kiln and has 'picked up' the image, but in a much more interesting and sketchy way than a direct screenprint.  There is just enough texture on the back of the glass; I can see endless possibilities in these two little strips of glass...


Sunday, 13 January 2013

Quiet

I've been quiet lately, I know I have.  The final year of my course is speeding along and I have been trying to find a way of working that suits me.

Perhaps because my work is quiet in feel, I find I work better in my own space at home rather than in the noise and bustle of the university studios.  Plus each day I stay at home saves me 2 hours of travelling time and quite a lot of petrol money; yet I can't get over the silly feeling that somehow I am 'playing truant'.  Despite this feeling, since Christmas I have been strict with myself and have stopped dashing around, giving myself time to think about my work and where it is going.

a sneak peek

I have also been worrying that my work has been getting so restrained that it is barely there at all; this timely post from Fiona has really helped me to resolve that in my own mind.

So this week I shall be quietly arranging and rearranging my fragments of glass and hope soon to have some resolved pieces to show you.

Thursday, 15 November 2012

More upcycled bottles

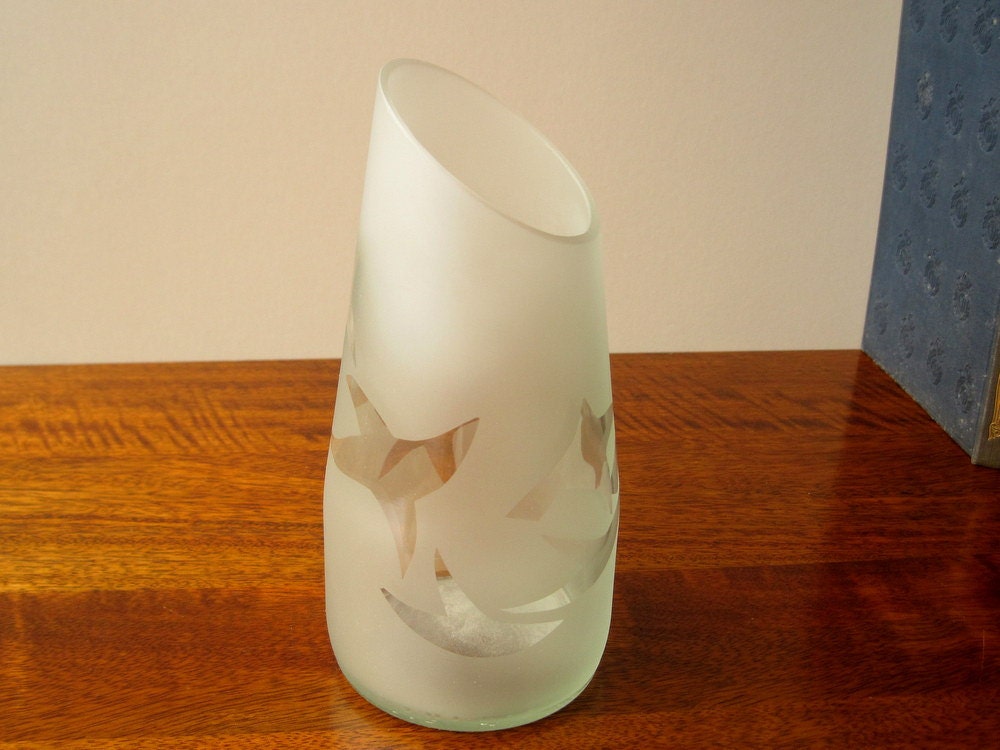
I am getting to grips with cutting the tops off larger bottles to make them into vases... a good thing too as I have quite a collection of lovely bottles now waiting for me to do something with them.

WIP topless bottles

After a lot of research (and ruling out buying my own brick cutting machine!) I decided that running a small diamond wheel at a slowish speed on my Dremel was the way to go.  The glass needs to be kept wet so of course I get wet too; I've invested in a proper safety visor to keep the wet ground glass spray away from my face.  And at the moment I do the cutting outside!

As you can see on the left, the initial cut is jagged and not very safe so I then spend some time polishing the edge smooth.  The one on the right is nearly done...

WIP jagged cut edge WIP nearly smooth edge

Next step will be to mask off my design and get sandblasting.

And in the best Blue Peter tradition, here's one I made earlier, now available in my Etsy shop.


Friday, 9 November 2012

An Upcycling Dilemma

There is a problem with using recycled materials to create with.  And the problem is, it is absolutely missing the point to go and buy something new just because you want to recycle the packaging, or in my case, the bottle.

My lovely husband braved the sidelong looks and smuggled an empty 330ml Ty-Nant water bottle out of a restaurant for me a while back, and since then it has been sitting on the shelf looking so lovely and blue, waiting for me to do something with it.  This week, I did.

Upcycled bottle vase

The bottle is interesting because it is not, as I expected it to be, blue glass, but clear glass with with a blue enamel coating.  Which means that, with a lot of patience, I could sandblast the blue away altogether to get a two-tone effect (I have to admit I stopped where I did because I ran out of patience, but I think it's enough!).  And the result is just so much better than I thought it could be.

I do have several of the larger 750ml size bottles which have been collected for me waiting to be played with; they appear to be blue right through; we shall see.  I'd love to have more of these little ones to work with but at the moment I am resisting popping over to Wales just to stock up... buying such small bottles of sparkling water really is a bit of an extravagance... isn't it?

Thursday, 24 May 2012

Almost done

Very nearly at the end of my second year at uni now, the final assessment is over, we've had the last lecture, just tidying up now and helping the third years get ready for their degree show.  The year seems to have rushed past extremely quickly, I have learned a lot but this has only highlighted to me how much I still have to learn.  Ah well, learning is good.

Photograph by Russell Smith

I didn't quite get what I wanted (i.e. free standing forms) from this final project; I ended up with one rather distorted free standing form, a set of 3 broken bits, and a rather nice piece which doesn't curve enough to stand by itself but miraculously slots together with the one that does.  So we took what I had down to the beach again, in rather better weather this time.

Photograph by Russell Smith

While I didn't manage to control the form I am pleased with the textures and the effect of mixing the wire with the glass.  And the colours are very me, and very in keeping with our beach, which 'my' colours always seem to be.

Photograph by Russell Smith

You might have noticed that I have credited my photographer; I did take some photographs but his were so much better!  And at least this time he had worked out how to use the flip out screen on the camera so he didn't have to lie on the wet sand...  He will be off to college in the autumn to continue his own artistic journey; you can see some more of his work here.

Saturday, 21 April 2012

More glass... and some knitting

This week I have been attracting attention by sitting in the canteen at uni knitting with wire. Having previously related mostly to textiley people this seemed a perfectly normal activity to me (along with setting fire to things in the car park and wrapping up any old stuff I find...) but as there isn't a textiles course at my uni this simple act seemed to be a huge novelty to most people!

Having knitted my wire I then attacked it with scissors and deconstructed it a bit, and layered it up with scraps of float glass something like this ------>

This picture was taken on the workbench so by the time I'd transferred all the bits to the kiln it wasn't quite the same, but near enough.

A bit of guess work with the kiln program (it always is) meant that the result was flatter and less 'lumpy' than I intended but I was thrilled with the way the wire reacted and with the texture the glass picked up underneath.  I hope you're ready to look through loads of pictures now...  To give you an idea of scale they are each about 30cm tall.

Float glass with knitted wire Untitled Untitled Untitled Untitled

And one without wire just to see...

Untitled

Friday, 30 March 2012

At last, some glass

It seems I start every post by apologising for not posting more often, which is a bit daft really.  But now I have a couple of weeks off for Easter so I can catch up with  all  some of the things I haven't had time to do lately.

So I thought you might like to see some pictures of what I've been working on at uni lately.  Our last module required us to produce a 'marketable product' within a certain price bracket and to research selling venues and produce marketing material and so on.  I rather enjoyed this module, I got to do some maths as well as some making.

My design idea was to produce a range of textured dishes on a textile related theme.  Opting to work with texture rather than colour was quite challenging as I had to hand make moulds for each of my designs but I really wanted to see whether I could do it quickly enough to produce something affordable.

Untitled

The textures are from some beautiful vintage Indian printing blocks I have.  Once I had made the moulds I started off working with float/window glass.  I like the way the green tint of the glass works with the texture, and it has the advantage of not being so horribly expensive that mistakes are a disaster.


This one was supposed to be the same rectangular shape as the other but due to a rather messy leak the plaster mould was too thin and snapped in half.  So I went ahead and used the broken half a mould and I think it works rather nicely as a square - this one was a happy accident!

Having proved that the moulds worked fine with float glass, I really really wanted to use coloured glass.  We're getting more expensive now!  Unfortunately the glass behaves quite differently from float glass and needs a completely different firing programme and although everyone had an idea, nobody really knew what programme I should be using.

Cue quite a few disasters (and remember we're using the expensive stuff...).  First we went too hot and ended up with sharp points on the edges, and pulled edges, and a hole where the glass had bubbled and burst.  Unfortunately there were 3 of these :(


Although,  some parts are really lovely so I am hoping to be able to cut away the dodgy bits and do something with the remainder.

Then we went too cold and had to try again... and when we did it was too hot again!

Finally, more by luck than judgement, we got it right...

Green glass dish

So now I know the firing programme to use for this particular glass provided I fire it at the right hand end of that particular kiln... don't ever let anyone tell you glass is an easy medium to work with!

But I am so pleased with the result it was definitely worth the ups and downs.  And more importantly, I developed an efficient and cost-effective method of making the moulds I need.

So, finally the acid test, I'll be listing some of the dishes in my etsy shop next week and I'll find out whether I really did come up with a marketable design!

Saturday, 18 February 2012

Playng with glass

I'm definitely an absent blogger at the moment, too much to do, not enough hours in the day, you know how it is.  Here is a sneak peak at what I'm working on at the moment...


It's a complicated process involving much mould making; this one only worked in part so we cut off the bits that didn't.  It's now about the size of a soap dish and rather lovely, though I say it myself!  Just need to polish up those edges now, without chipping it...

Wednesday, 18 January 2012

Light and Space

Part of the reason I have been so madly busy lately is that we have been preparing for an exhibition as part of the current module at uni.  The exhibition is called Light and Space and features work from all the second year applied arts students, so there is ceramics and jewellery/metalwork on display as well as glass.  It is on at Theatr Clwyd in Mold for the next month - find the details here - all welcome!

For my pieces for the exhibition I have been working on incorporating images into glass blocks.  The images I am using are taken from some of my collagraph prints, recreated as screen prints and printed onto the glass.  I've then been layering up the glass and fusing it together.  The next step is to trim the sides of the block - here is a block-in-progress.


As you can see, the trimmed side does not have that nice clear 'glassy' look to it... it takes a LOT of polishing to get it back to that state.  And it's very easy to chip corners and edges during the polishing process.  And each block has four sides and eight corners... you get the picture!  I still need to iron out a few problems, the kiln temperature is not quite right yet, and the polishing needs more practise (probably not being in a rush would help!) but I'm getting there.


Light and Space

You can see the rest of my pieces here on my Flickr.

Wednesday, 2 November 2011

Platemaking

I have been madly busy this week trying to get on with the practical part of our first assignment of the term.  Between a team of us we have to produce an 8 place table setting.  That's 8 of everything.  I'm making plates.  8 of them.

I have been working my way through the casting process I want to use, finding out what works and what doesn't.  It's quite a long winded process; first make a clay form of the plate...

Platemaking - clay form

...then make a plaster mould of the clay form, carefully clean out all the little bits of clay left behind and wait several days for it to be dry enough to use.

Platemaking - plaster mould

Drill the base of the mould full of holes to let the air escape during casting, and place in the kiln. Cut 2 circles of glass and place in the mould in the kiln. Cook overnight, keeping fingers crossed. And if I'm very lucky the result will be a glass plate with no lumpy bubbles (glass is so hard to photograph)...

Glass plate

Glass plate

Glass plate

Repeat. With a bit of luck, and if it is not moved, a mould can be used 2 or 3 times before it really starts to crumble.

2 down, 6 to go!

Saturday, 2 April 2011

A decision?

As you probably know, the degree course I am on requires you to choose a specialism - the choice is Ceramics, Jewellery/Metalwork or Glass.  Very very difficult!  When I started I was fairly sure that I would choose metalwork and go on to combine it with my textile work.

But then I discovered that working in glass can give you all the elements of texture and layering that I love to play with in my textile work, and I was hooked!

This week we have been doing low-relief casting in the kiln, creating moulds by cutting up pieces of fibre blanket to give form and texture.  We layered cut pieces of fibre blanket and sheets of float (window) glass - if the pieces of blanket go right to the edge you can put them between the sheets of glass  to create gaps too.

My design all layered up and nearly ready to go - the edges just need to be trimmed.


In the kiln, surrounded by pieces of kiln shelf to keep it in place.


And this is how it came out!

Low relief cast glass panel

Low relief cast glass panel

Kiln cast glass

Now, I didn't have this in mind when I designed the piece, but isn't it perfect?

LinkWithin

Related Posts with Thumbnails