Showing posts with label collagraph. Show all posts

Wednesday, 3 April 2013

Something completely different...

Towards the end of April, as part of our course, the final year students will be creating a pop-up gallery/shop in Wrexham, and we are tasked with stocking it with lovely things at affordable prices.  Since the glass  pieces I have been working on are somewhat experimental I wasn't sure that they would be suitable (or finished!) so I have gone back to my first love, textiles, and combined it with my second love, printmaking.


I've used various scraps of trim and edgings, some vintage, some reclaimed and some just 'spare', to make a series of collagraph plates.  It's a great way to use pieces that are too small for much else, and even pieces that are falling apart; they can be 'repaired' when they are glued to the  plate.  All you need to remember when you're making the plates is that you can ignore the colour and just concentrate on the texture.


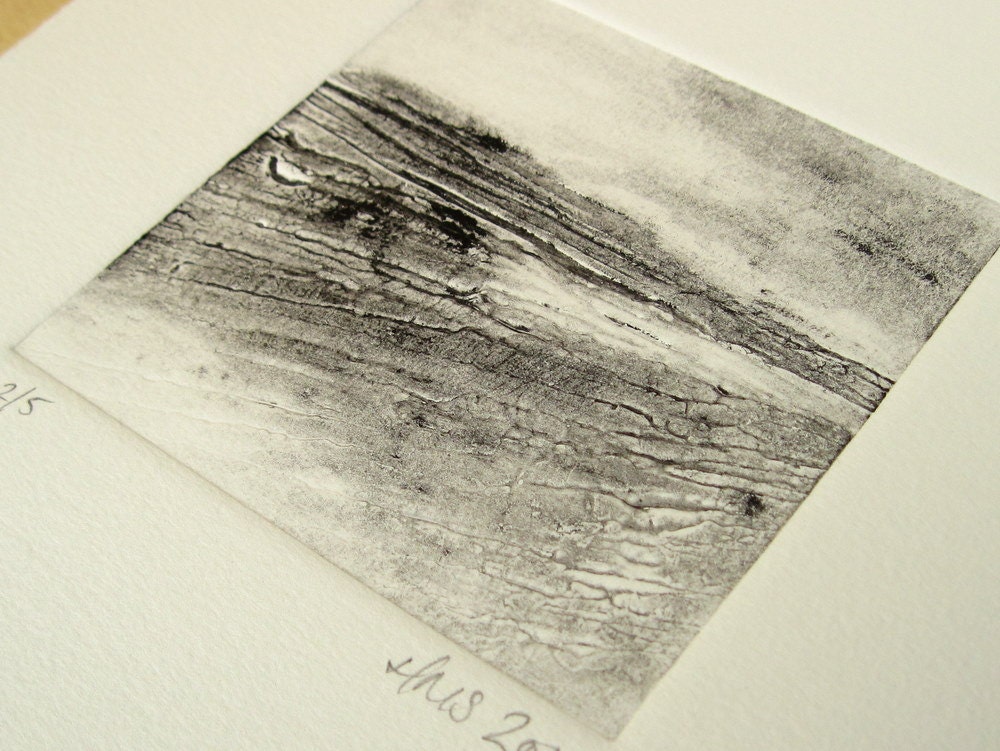
My idea was to create printed backgrounds from the trims onto which I could add 'real' pieces of trim.  I originally thought I would ink the plates in a brown colour to give that vintage feel, but I didn't really like the results, even the palest colour seemed to overpower the delicate pattern and texture.


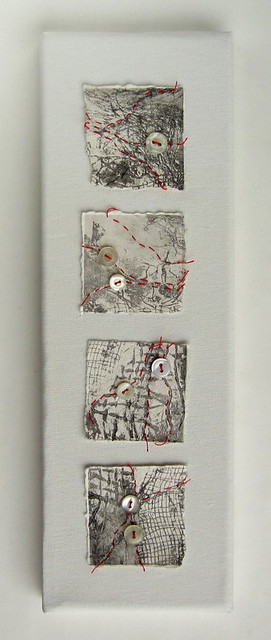
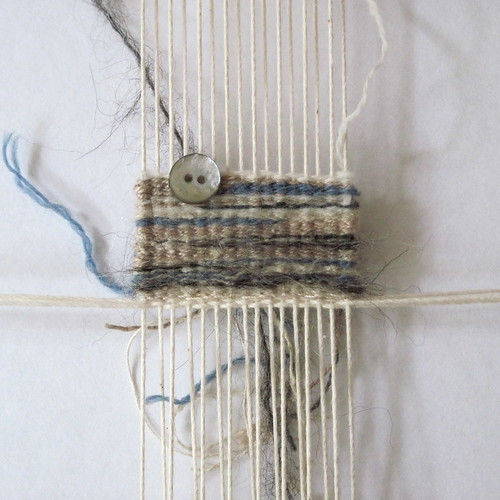
So I decided to stick to blind embossing, which is a much quicker and cleaner process without the ink, better all round!  I've been having fun 'auditioning' buttons from my button tin and scraps of trim from my ribbon box and I have finally made some decisions and sewn a few on...  I'm struggling to decide which is my favourite.  What do you think?


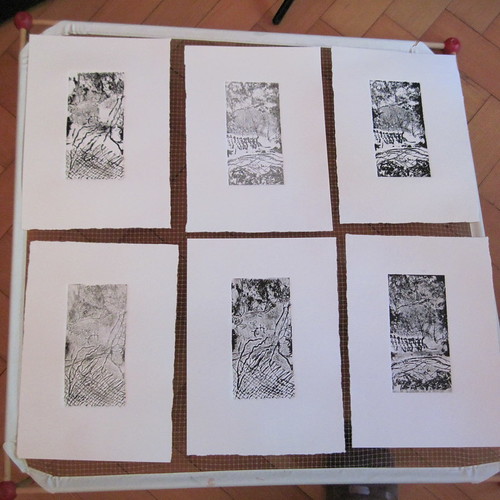
The paper size for these prints is just under A5; I think the size works well with the scale of the elements.  I am wondering whether to do some A4 sized ones as well or whether the extra 'bits and pieces' needed to fill the space will make them look too cluttered.

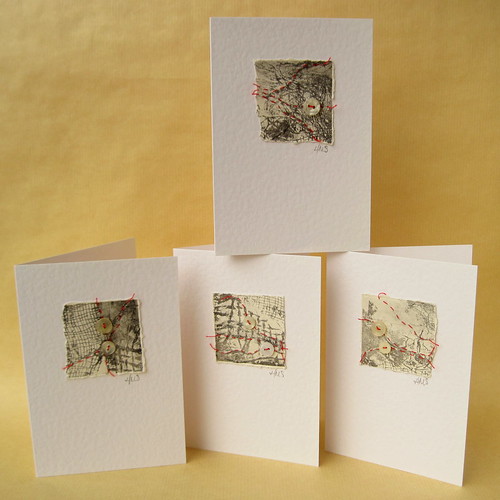
When I'm embossing I nearly always have a few disasters where either the plate or the paper moves and the whole thing ends up crooked.  There's nothing really that can be done with those prints except tear them up, which is ideal for making cards.


I was so pleased with these cards that I made a couple more prints on scraps of paper just so I could make some extra for my Etsy shop; I'll be listing them just as soon as I get some decent photographs.

And if you're anywhere near Wrexham during the week 22nd to 26th April, do pop along to the People's Market to see what other lovely things we have on show.

Monday, 14 November 2011

Red threads

Red thread on collagraphSometimes ideas take a long time to crystallize. I knew when I first starting making collagraph prints that I wanted to stitch into them, but the question was, how? I tried stitching into a couple but I wasn't particularly pleased with the results, so I left the idea for a while.

So I was leafing through my pile of test prints the other day mulling over a friend's suggestion that I should use them to make cards. They are really too big to use on a card as they are so I chose one and tore it into quarters.

And then... I thought, what these really need is a bit of red stitching. So out came the red thread, and then a collection of vintage shirt buttons, and this is what I ended up with.

I quite like them arranged together like this on a plain canvas.  I've realised that the reason the print fragments shouted 'red stitching' at me is that they really remind me of little map fragments and of course the red stitched lines are footpaths.  I'm not so sure about the why of the shirt buttons though, nice places to have lunch perhaps??

Anyway, after dithering for a while I decided to stick with my original idea and use the stitched fragments for cards.  I'll be listing them in my hypsela shop on Etsy starting later on today.

Red thread on collagraph cards

Wednesday, 21 September 2011

New stuff

I've been photographing new stuff for both my shops today!

I have some new flower colours - the first for a while.  I've made some in lime green - I love lime green, I don't know why I haven't done it before!  And also some of the bigger flowers in a pretty coral pinky-red, one of the colours for the season, apparently!  They look rather good together too!  I'll be listing them in my Etsy and Folksy ffflowers shops over the next couple of days.

New ffflowers - coral and lime

And I've listed the first of the prints that are left after the exhibition in my hypsela shop.  There will be a few more to come as well.

original collagraph print

And I will be listing some new brooches too - pictures of those will have to wait until tomorrow I think!

Monday, 8 August 2011

Prep Work

I think I've mentioned before (once of twice!) that my prints are going into an exhibition this week. A nice feature of this exhibition is that the exhibitors put out their sketchbooks for the visitors to look through.

Now since a lot of my prep work for the prints have been test prints I haven't been working in a book - can't put a book through the press! So I have been collecting together all the bits I have done, the transferred photographs I started with, the charcoal drawings I did, the test prints from the plates that worked and the ones that didn't really, and of course the plates themselves.

And I've bound them together into a book.


Well I haven't actually included all of the test prints because there were so many of them... but a representative selection!


I toyed with the idea of adding a little colour here - decided against it.  Although it's something I will probably come back to in the future.


This print was one where I applied the ink with a roller rather than rubbing it on.  It's really surprising how different a print can look just by changing the way the ink is applied.  In the end I didn't use the roller for any of my final prints, it didn't seem to suit the soft landscape look I was after.

And I also mounted (most of) the printing plates and included those too.  Hopefully they won't make peoples fingers all inky - I have cleaned them, but still...


Hanging tomorrow... the exhibition details are here, do pop along if you can!

Monday, 1 August 2011

Work in progress


Busy getting ready to print at the moment... 2 new plates all varnished and ready to go...


... and a stack of lovely soft creamy paper all ready and torn to size.

Monday, 18 July 2011

More Collagraphs

I did manage to snatch a few minutes printing time while the birthday party was going on upstairs on Saturday - kids parties are so much less stressful these days!


The prints from the torn paper plate were OK, I can see potential in the textures, perhaps not in this arrangement.  Although I have only applied the ink with a roller, rubbing it on/off gives a different effect again.

And I definitely need to practise getting the prints straight on the paper - it is so difficult!


But it was the plate with the textured acrylic paint that I really wanted to try out and I wasn't disappointed!


For this print I applied the ink with a roller                    and for this I rubbed the ink on with a cloth


But this one is my absolute favourite, again I applied the ink with the cloth, wiping it off in some areas and leaving other areas darker. This definitely has the feel I am looking for and I shall be making more of these plates.

Tuesday, 14 June 2011

Test prints

Rest assured I am working on the second part of the textured paper tutorial - just need to organise a couple more photos...

In the meantime I will leave you with some images of collagraph test prints I made the other day...  I made a series of little ACEO sized experimental prints.


These are prints of a dried up weed from one of my garden tubs - quite pleased with these - I might do another with a more interesting background.  I have plenty of weeds!


These are a piece of birch bark I picked up on a walk the other day.


This one is scraps of lace and fabric - not so sure about it, but the black bit really looks like some weird sea creature, so that might be useful at some point.


And this one is one of the printing plates I cut up the other day - I think it looks better now!  I wasn't sure when I printed it but now I've come back to it I do like it.  I need to try it on some proper paper next.

That's all my printing... now I'd better go and sort those photos for the rest of the tutorial!

Thursday, 2 June 2011

Distracted

So, I have a new printing press which I had been waiting really impatiently for, and what happens?  I get distracted by a bag of woolly bits!


I find weaving on a small scale like this to be really calming and therapeutic, and, after all, things have been rather hectic round here lately!  I think this piece might make quite a nice little brooch when it's finished, with the addition of a button perhaps, and maybe some beads along one edge... what do you think?

Weaving

I haven't neglected the printing completely - I made up these 3 little test plates, here all ready for their shellac coating.

 
And I decided I wasn't all that keen on the composition of the plates I made the other day, so I cut one of them in half


and chopped the top and bottom off the other one.


Maybe a little drastic, I shall let you know how they turn out!

Tuesday, 31 May 2011

Printing

I have been a bad blogger, I know. But, lectures have finished, I've had my assessment, and term ends this week so I have no more excuses!

I have been a little distracted by this...

New printing press

... my very own printing press!

Today I tried it out for the first time with a couple of collagraph plates I made a while ago.  Here is the very first print made on my very own printing press...

My first print

... and a few more... just test pieces, I'm not using my expensive paper yet!

Lots of prints!

I do think I need a bigger and better drying rack though.  This one is a bit limited in size, it is meant for sweaters and for some reason it only has 3 legs now.  But it will have to do for the time being.

So for the next few days I shall mainly be making printing plates!

Friday, 25 March 2011

Collagraph Printing

One of the great things about doing an art degree is that you get to try out lots of techniques not directly related to your core subject.

I have really been enjoying experimenting with collagraph printing.  Having worked so much with textiles I have bags full of lovely little scraps of textured fabric and fibres that I simply cannot bear to throw away, and making collagraph plates has been the perfect opportunity to put some of them to good use.

My plates are simply a small square of thick cardboard onto which I have glued little scraps of texture. Once the glue is dry the plates need to be coated with varnish to seal them - I use shellac because it's nice and thin and dries quickly.

Then it's a matter of experimenting with applying the ink - some plates work better with the ink applied to the high points, some work better with the ink applied all over and then wiped off the high points.  The ink is oil based and rather sticky - quite different from anything I have worked with before.  The paper is soaked, placed on top of the inked up plate and sent through the printing press and you never quite know what will come out the other side.  One of the trickiest things is getting the plate and paper lined up so you don't get a wonky print - I've had to practise that!

Cue lots and lots of photos -a bit repetitive - I hope you don't get bored!


I couldn't resist doing a bit of stitching on this one!  The next one I added some water based colour afterwards.


And I did some not-black ones too - although I wasn't very adventurous with the colour!


One of the other fun things is to put the plate through the press without any ink at all, to emboss it onto the paper.


And here it is with just a bit of ink...


I've been back in the print room today, I'm just waiting for a whole new set of prints to dry now...

LinkWithin

Related Posts with Thumbnails